

Custom Tin Packaging: How to Design a Better Unboxing Experience
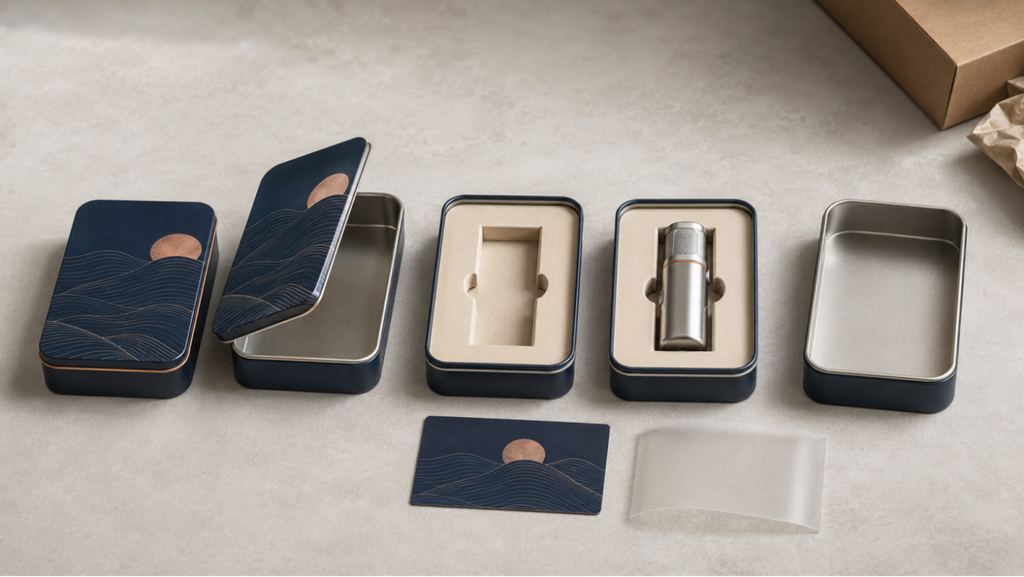
Unboxing is not a single visual moment. It is a sequence of expectations: the pack arrives intact, the lid feels deliberate, the product is presented in the intended position, and the materials make sense for the brand. Custom tin packaging can strengthen that sequence because it combines rigidity, print coverage, tactile opening, and the possibility of continued use.
A premium result does not require the most complicated structure. It requires the right structure, clear hierarchy, controlled product movement, and details that survive manufacturing and shipping. This guide shows how to design that experience without confusing decoration with performance or making unsupported claims about customer loyalty and return on investment.
Map the Unboxing Sequence
List what the customer sees and does from the shipping carton to the product. The sequence may include a protective sleeve, the printed tin, a lid message, a card, an insert, and the product. Every layer should have a job: protection, orientation, information, tamper evidence, or emotional pacing.
Remove elements that repeat the same message or add disposal without improving protection. A well-proportioned personalized tin box with one purposeful insert can feel more premium than a dense stack of wraps, cards, and plastics.
- Arrival: no dents, scratches, loose lids, or scuffed windows.
- Recognition: brand and product are clear before the tin is opened.
- Opening: lid force and direction feel intentional.
- Reveal: the product is centered, accessible, and correctly oriented.
- After use: the tin has a plausible storage or display purpose.
Choose the Closure for the Desired Emotion
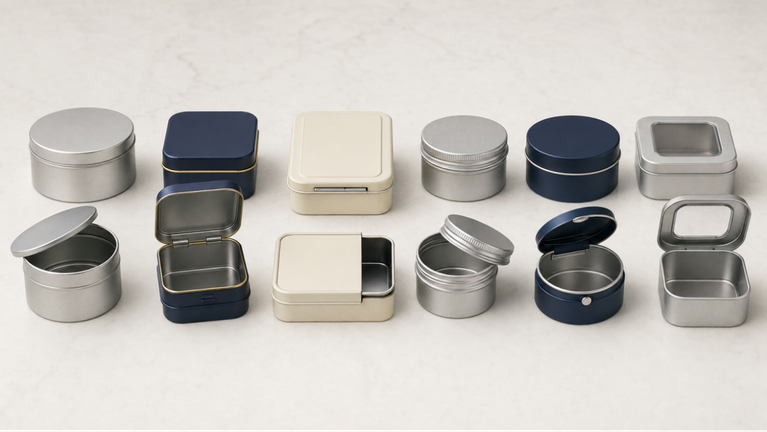
Review hinged lid tins [Internal Link], slide lid tins [Internal Link], screw top tins [Internal Link], and window tin boxes [Internal Link] with the real product. Opening force, sound, and alignment can only be judged accurately on a filled sample.
| Closure | Unboxing signal | Best-fit use |
| Slip lid | Clean, calm, classic reveal | Tea, cookies, candles, gift items |
| Hinged lid | Connected, book-like opening | Kits, stationery, gift assortments |
| Slide lid | Compact and interactive | Mints, cards, small accessories |
| Screw top | Controlled, secure, repeated-use cue | Balms, powders, travel items |
| Window lid | Product proof before opening | Confectionery, crafts, colorful assortments |
Use Inserts to Control the Reveal
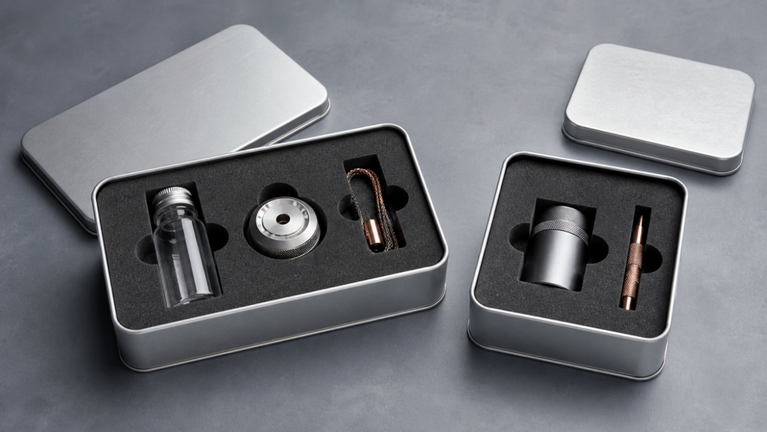
An insert holds the product in the position the design promises. It can reduce rattle, separate components, create finger access, protect surfaces, and reveal the product at a chosen height. Materials include folded paperboard, molded pulp, EVA, fabric-covered board, and selected plastics, depending on product protection and market requirements.
Avoid designing the insert after the tin. The product, insert, and internal dimensions should be developed together. Check assembly speed, orientation mistakes, tolerance, material recovery, and the way the insert looks after parcel vibration.
Make Printing and Finishes Support the Story
The lid should carry the primary message; side panels can handle secondary information; the base can hold technical or regulatory copy when appropriate. A limited palette, consistent typography, and intentional metallic areas produce stronger hierarchy than filling every surface.
Matte, gloss, embossing, debossing, and metallic effects change both appearance and touch. Select one dominant sensory cue and test it on the formed tin. The tin packaging finishes guide [Internal Link] and custom printed tins design guide [Internal Link] help translate the concept into production artwork.
Design for Shipping, Photography, and Reuse
The unboxing experience begins before opening, so transit performance belongs in the creative brief. Carton dividers, sleeves, protective films, lid retention, and surface coatings should be tested against the intended distribution channel. E-commerce parcels often need more dent and scuff protection than palletized retail deliveries.
Photography also reveals defects customers may overlook in person: inconsistent gaps, fingerprints, dust, and warped reflections. Approve samples under both retail and studio lighting. If reuse is part of the message, make the size, graphics, and closure useful enough for a credible second life.
- Run filled-pack drop, vibration, stacking, and abrasion checks appropriate to the channel.
- Confirm lid retention after temperature and humidity exposure.
- Set cosmetic criteria for dents, scratches, color variation, and registration.
- Photograph the final sample from the angles used in product listings.
- Avoid claiming measurable sales or loyalty gains without brand-specific evidence.
Frequently Asked Questions
What makes custom tin packaging feel premium?
A controlled opening, precise fit, clear graphics, clean surfaces, and purposeful materials create premium perception. Extra layers and effects only help when they support the product and brand.
Which insert material is best?
The answer depends on product weight, fragility, surface sensitivity, assembly, target appearance, regulatory needs, recycling goals, and cost. Test the complete filled pack.
Can unboxing improve repeat sales?
It may support brand memory and sharing, but the effect varies. Measure customer feedback, returns, reviews, reuse, and repeat purchase rather than assuming a universal ROI.
Conclusion
A better unboxing experience is a better-controlled packaging system. Custom tin boxes offer strong tools—rigidity, print, tactile lids, inserts, and reuse—but the experience succeeds only when every component supports the product journey.
To review structures, mockups, and sample options, contact ShingWah Tins [Internal Link] with the product, dimensions, quantity, artwork stage, channel, and launch date.
Technical note: Product-contact, barrier, shelf-life, child-resistance, recyclability, regulatory, and performance claims must be verified for the exact packaging system and target market.
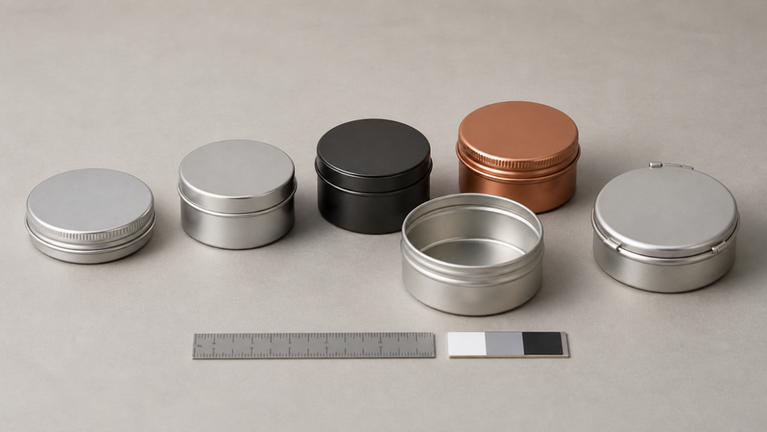
![Aluminum jars and tin containers are often selected for eco packaging because they are durable, highly visible as metal, and compatible with recycling systems in many markets. Those strengths are real, but a responsible design still needs to minimize unnecessary material, protect the product, explain mixed components, and avoid promising that every customer will reuse or recycle the pack. This guide turns sustainability goals into practical packaging decisions. It focuses on lightweighting, reuse, refill concepts, closures, decoration, transport, and market-specific end-of-life communication rather than treating material choice as the only environmental question. Begin with a Clear Environmental Objective Choose one or two priorities that can be designed and measured: reduce pack mass, improve case utilization, remove an unnecessary insert, support a refill format, increase product protection, or make components easier to separate. A vague goal such as “make it greener” is difficult to translate into specifications. Keep the product function fixed while comparing options. A lighter container that increases damage, leakage, or spoilage may not improve the overall result. Lightweight the Complete Pack Aluminum’s low density can support lightweight small jars and tins, while tinplate’s strength and shape range can deliver efficient walls and rigid gift formats. The useful metric is the mass of the complete pack that performs the required job, including lid, liner, insert, label, sleeve, and shipping protection. Reduce headspace and oversizing before reducing wall strength. Optimized dimensions can improve units per carton and pallet while maintaining product fit. Any material or gauge change should be validated through forming, filling, and distribution tests. Design Reuse That Customers Can Believe Reuse should be treated as a program or a credible behavior, not a guaranteed outcome. If the brand offers refills, define how customers obtain them, how the container is cleaned, and how long the closure remains functional. Reuse design choice Why it helps What to avoid Useful size and proportion Fits common storage or travel needs Novel dimensions with no plausible second use Durable closure Supports repeated opening and keeps components together Loose lids or fragile decorative parts Evergreen graphics Makes the container acceptable after the product is gone Highly dated copy when long-term reuse is claimed Easy cleaning guidance Helps safe and realistic second use Unclear food or cosmetic reuse claims Refill compatibility Can reduce replacement packaging in a controlled system Refill claims without an available refill route Make Mixed Components Easy to Understand Liners, seals, windows, foam inserts, labels, and coatings may be necessary for product performance. Avoid removing a functional barrier only to create product waste. Instead, minimize the component, select it carefully, and make separation instructions clear where local recycling systems accept the materials. The comparison of tin vs aluminum packaging [Internal Link] provides a broader framework for market-specific recyclability, product protection, and evidence-based claims. Use Decoration Efficiently Metallic surfaces can reduce the need for simulated foil effects when the artwork intentionally reveals the substrate. Direct printing can integrate graphics with the pack; labels can support versioning or shorter runs. The lowest-impact option depends on production quantity, waste, changeovers, and the final design. Keep graphics useful after purchase if reuse is part of the strategy. The custom printed tins guide [Internal Link] helps organize artwork, safe zones, color, and proofing for formed metal packaging. Document Claims and Validate the Pack A practical eco friendly custom packaging brief should include measurable requirements and the evidence needed to support public claims. Keep that documentation with the final approved specification. •Record actual material and component weights for the approved design. •Verify supplier declarations for material, coatings, and any recycled-content claim. •Test product compatibility, closure, leakage or migration, filled-pack transit, and shelf life as applicable. •Check local recycling guidance in each target market before printing disposal claims. •Explain how to separate windows, liners, seals, or inserts when relevant. •Review sustainability language when the structure, supplier, or destination changes. Frequently Asked Questions Are aluminum jars eco friendly? They can support lightweight, reusable, and recyclable packaging designs, but the overall result depends on source, mass, product protection, transport, reuse, and local recycling. Should a brand choose refillable packaging? Refill works when there is a convenient refill supply, a durable container, clear cleaning and use guidance, and evidence that customers participate. A refillable-looking pack alone is not a refill system. Can metal packaging include plastic components? Yes when they serve a necessary function. Minimize them, choose compatible designs, and provide realistic separation and disposal guidance for target markets. Conclusion Aluminum jars and tin containers can support credible eco-packaging strategies when the brand optimizes the complete pack, protects the product, designs realistic reuse, and communicates end of life with market-specific evidence. For material, closure, and sample recommendations, contact ShingWah Tins [Internal Link] with the product, quantity, market, decoration, channel, and measurable sustainability goals. Technical note: Product-contact, barrier, shelf-life, child-resistance, recyclability, regulatory, and performance claims must be verified for the exact packaging system and target market.](https://shingwahtins.com/wp-content/uploads/2026/05/image-1-767x432.png)
One Comment
Comments are closed.